Golf is a funny sport. To think that you could miss hitting irons off the tee on the golf course because your club is too long by ½ inch is some sick joke.
Luckily fixing this issue is relatively simple, and if you have the tools, you should be able to do it yourself.
This post will go into how to know if you need to shorten your golf club length and how you can do it from home.
Quick Menu
Can You Shorten Golf Clubs?
Shortening golf clubs to your desired length is a relatively straightforward process.
Making your golf club longer or shorter is simple once you have the necessary tools and know the process, which you will find out later in this post.
A golfer new to the game won’t know they can get shorter clubs and think the clubs in a golf shop only come in one length. More experienced golfers will know this is not the case.
It’s one of the first adjustments a golfer will make when getting fitted for new golf clubs at the driving range or their local golf store. Usually, these stores won’t offer custom fittings for old clubs; only the more recent models of clubs they have in store will have the option of custom fitting.
This is why new golfers are unaware because it’s only once the golfing bug has completely taken over that you’re willing to spend hundreds, if not thousands, of dollars on a set of clubs.
If you want to shorten your golf clubs, you may have to do it all by yourself.
But how can you tell if shortening a golf club is the way to go?
How To Know if You Need Shorter Golf Clubs
Figuring out if you need shorter golf clubs is pretty simple, and there are two signs you need to look out for.
The first sign is if you’re almost standing up straight before your golf swing rather than feeling directly over the golf ball.
Picture how a professional stands when hitting a shot with their irons. It looks like they are hunched over the golf ball. Most amateur golfers look like they are standing up straight, their head pointing towards the clouds, with a slight forward lean on the hips.
Which is why you should know how far you should stand from the golf ball.
If this is you, your golf clubs could be too long.
The second sign is that the golf club head does not sit flush with the ground.
When your golf club is the correct length, the club head won’t be tilted up on the toe or back on the heel of the golf club. Pay attention to this because if you’re doing everything correctly, but the toe of your club still points up, you may need to shorten the golf club.
Now if you want to be 100% certain that you need to shorten your clubs, go to your local driving range, golf store, or clubhouse pro and pay for them to measure you up correctly.
They will consider how tall you are, how long your arms are, how you’re striking the golf ball, and other things. Then they can tell you how much you need off or if you should leave them as they are.
But is shortening your golf clubs a really good idea?
When you shorten a golf club, you don’t just change the length; you also change the club’s weight and even the stiffness.
Now if you’re only taking half an inch or so, you will notice little difference. However, you can significantly alter the club’s performance if you’re trimming your golf clubs.
Sometimes it may be easier to grip your club further down the grip and shorten your clubs that way.
What You Will Need To Shorten Your Golf Clubs
Before you start, you must ensure you have the tools to shorten your golf clubs. The last thing you need is a bunch of chopped-up unfinished golf clubs laying around…
The list below assumes you don’t have access to heavy machinery and will do this at home in your tool shed.
- Study Clamp Or Vice – Holds the golf club in a stable position.
- Towel, Foam, or Rubber Tubing – Wrap around the golf shaft so the golf clubs don’t get damaged from the clamp or vice.
- Sharp Knife Or Utility Knife – For cutting the rubber grips of the top of your golf clubs.
- Adhesive Tape Or Grip Tape – Prevent the golf shaft from splintering while cutting.
- Hack Saw – For cutting through the metal golf shafts.
- Rod Saw Blade – Designed for cutting through graphite golf shafts.
- Markers – To mark your cut points on the golf shaft.
- Tape Measure – To estimate how much you’re going to cut off.
- Golf Grips – You will need new golf grips after you cut your old ones off.
- Adhesive Tape & Solvent – For putting the new grip on once you’ve finished cutting.
- Sandpaper – To smooth out the sharp edges left from cutting through the golf club shaft.
Now, if you have access to heavy machinery like a table saw or sanding belt, it will speed up the process dramatically, but only use them if you have experience doing so.
How To Shorten Your Golf Clubs
Follow the steps below to shorten your golf clubs safely.
Secure The Golf Club
To safely carry out the shortening of your golf clubs, it’s essential to secure the golf club in a vice or clamp safely. Placing your clubs in a vice will prevent the golf club from moving, which could cause inconsistent cuts or potentially cause injury to yourself.
Use a towel or foam/rubber tubing to wrap around the golf club where the clamp or vice is pressing on.
This will prevent any unwanted damage to the shaft, as you must have it tightly secured.
Remove The Old Grip And Tape
Once your club is safely secured, you can start removing the old golf grip on your club.
To do this, get your sharp knife and carefully slice down the side of the grip, careful not to cut yourself. Don’t be afraid to apply pressure as you cut; this should also help cut through the tape underneath the grip.
Now you can peel the old grip off and the old tape. Some tape will likely be stubborn and come off slowly. Using some solvent or white spirits and a cloth, rub up and down the old tape, which will help it to loosen.
Once it’s loosened, it should be easy for you to scrape off.
Measure And Mark Where You Will Cut
Place your measuring tape/stick at the top of the shaft where you will make your cut. Hold it tight to the shaft, and then, with your marker, mark the cutting point on the shaft.
Although simple, this step can be poorly done so easily. Make sure you’re using the exact measurement and keep your markings of similar width and position.
It’s easy to mark your cuts wrong, and it can be as simple as pressing harder when marking one club than another. This can cause one line to be thicker than the other, leading to the cut being off.
Important to note that you must be confident about how much you will try to take off the golf club. Once it’s off, there’s no easy way to put it back on, so be careful.
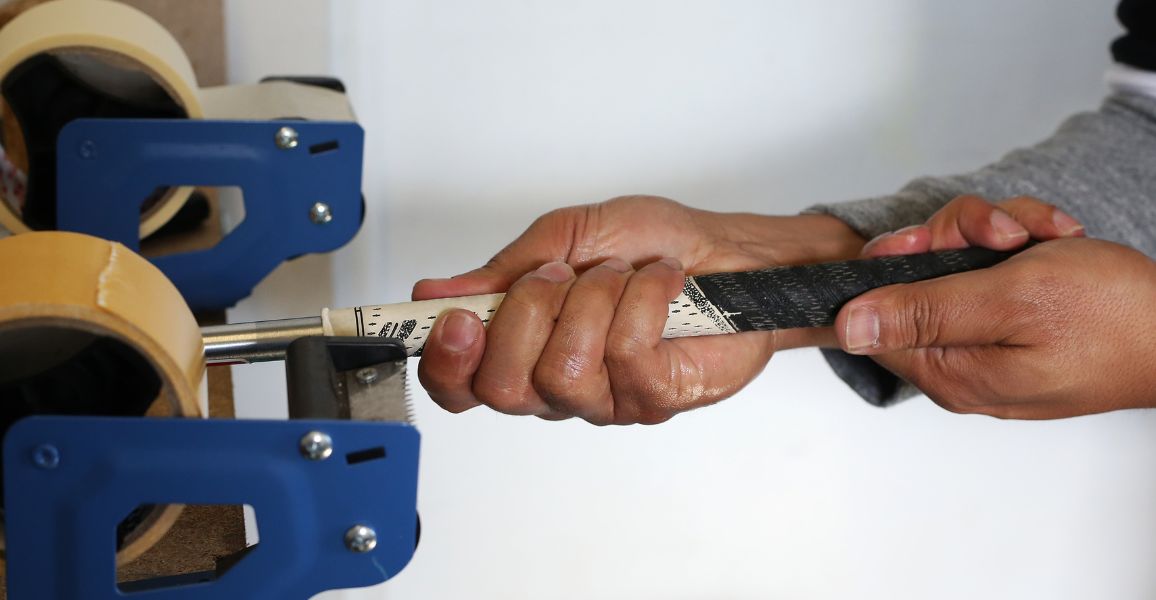
Once you’ve made your mark on the shaft, wrap some adhesive tape around the top of the shaft down to your cut mark. This should prevent the shaft from splintering when you cut.
Make The Cut
When cutting your shaft, don’t be afraid to reposition it in your clamp or vice to make it easier to cut. Setting it horizontally will make it easiest to apply pressure as you saw through the steel shaft.
The same applies to graphite shafts.
Before cutting deep, make some small cuts first to ensure you’re on the marker line, and once you’re happy, proceed with cutting through the shaft.
Once complete, leave the golf club for a while, as the top of the club will be hot and sharp from the cut you just made. Once it’s cooled down, you can move on to the next step.
Smooth The Area You Just Cut
When the golf club has cooled down, you can then work on sanding the edges down, preventing you from injuring yourself or the edges from cutting through the new grip.
It’s best to do this with fine sandpaper and take time to prevent any injuries from rushing and letting your hand slip.
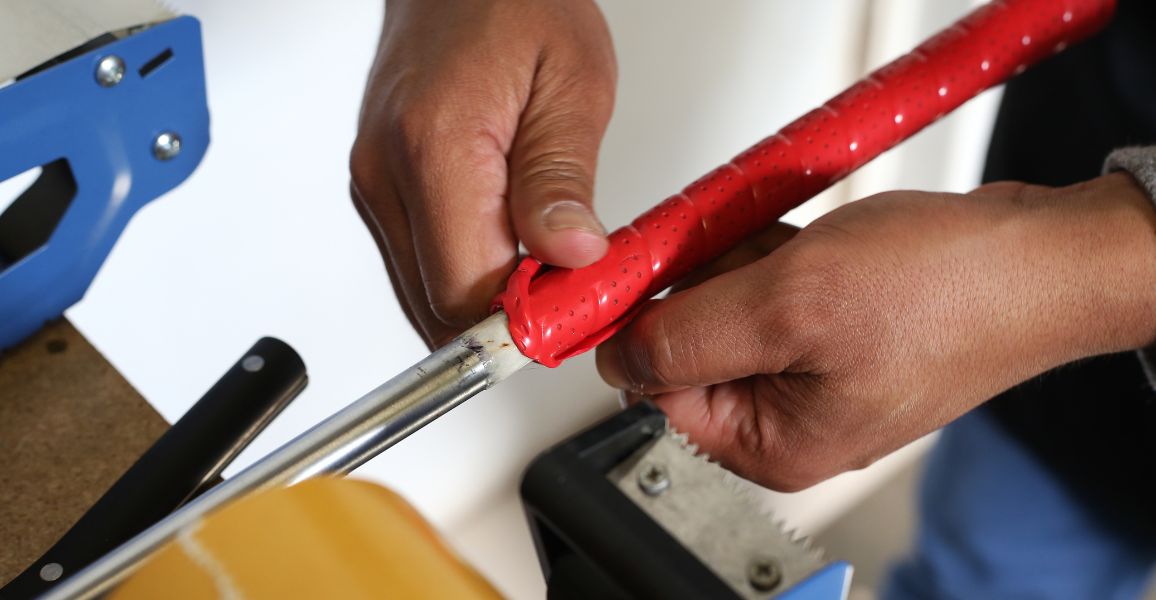
Put On A New Grip
Considering everything has gone well, you can now move on to putting a new golf grip on the golf club.
To do this is simple: first, you are going to measure the length of your grip, then make a mark where the end of the grip will end on the club.
Another way to do this is to hold the grip against the shaft and make your mark at the end, whichever you prefer.
Once you have marked the shaft, you can start wrapping your adhesive tape around the club, keeping it tight and free of air pockets. When doing this, you should overlap the tape on the last piece you’ve applied until the area is covered.
Now, you should apply solvent to the tape and the inside of the new grip. This will counter the stickiness of the tape and allow you to slide the grip over the tape.
When applying it to the new grip, plug the hole at the top.
After the grip is in position, you must leave it to dry. How long this will take depends on how you applied the grip and the tools you’ve used.
On average, it’s best to leave them for 24 hours to fully dry out before using them. But there are faster ways to speed this process up that you can find out about in the below post:
How Long For Golf Grips To Dry?
Or if you need help picking the best clubs for you check out the below post:
Best Game Improvement Irons For Beginners